Wednesday, August 29, 2012

Web Tool Wednesday: Zunal WebQuest Maker

It's Wednesday again! This week's tool is Zunal WebQuest Maker. It takes the traditional format of a WebQuest (Introduction, Task, Process, Evaluation, Conclusion) and provides an easy to use tool for creating your own. You can also easily browse Web Quests made by others. 

I had trouble finding how to search at first, but finally located the search feature when I clicked on Browse. On the Browse page, you get a grid at the top that is organized by subject area along one axis and grade level along the other. The table shows how many Web Quests are in each category. For instance, there are 18 Web Quests for Foreign Language for grades K-2. Clicking on any of the numbers narrows the results below to that section. The Search feature is located under the grid.

Pros
  • Web Quests can include links and file attachments. 
  • There is a rubric creator integrated into the tool
  • There are lots of Web Quests you can browse to find a ready-made one that works for your class.
  • The professional (paid) account allows you to adapt others' Web Quests for your own use.
  • The professional (paid) account is not very expensive.
  • Some of the Web Quests I found were of excellent quality--higher-order thinking skills, well-organized, and all materials ready to use.
  • Users can review Web Quests for quality.
Cons
  •  The free account limits you to creating just one Web Quest.
  • The professional (paid) account is only available in a 3-year subscription.
  • The Web Quests I visited had a large range of quality. Some seemed to really just provide a list of links and a simple task. Some referenced links or files that were not included.
  • None of the Web Quests I visited had any reviews, making the review feature useless.
Here are some sample Web Quests that I liked:
Do you use Web Quests in your classroom? Did you find any Zunal lessons that looked like they might work in your classroom? Would you be willing to pay for this service? Tell us your thoughts in the comments!

Monday, August 27, 2012

This Week in the Preschool Computer Lab: Picture Cards

Someone will be making a video of my teaching in the lab this week. Nerve-wracking! In trying to think how to spice things up a bit, I came up with a quick idea that may be useful in a variety of classrooms. As a regular part of my lessons, I quiz my preschool students orally about the parts of the computer. Once we've learned all of the parts, we practice with questions like, "Which part can I use for writing on the computer?" [keyboard] "Which part is kind of like a T.V.?" [display] "Which part is the place where the games come from?" [system unit]

I have also on occasion incorporated other types of prompts, such as playing recordings of the hard drive, the clicking mouse button, or someone typing, to see if students can identify which part they are hearing. This year I may do one of those macro photo super-close-ups too and see if students can recognize a part from a small detail.

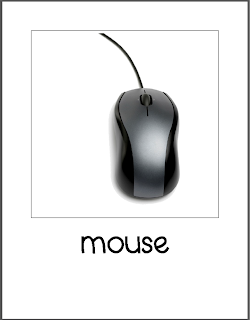
Now for my idea. It has always bothered me that I have my preschoolers sitting on the carpet for so long while we do our introductory mini lesson. I've always wanted to incorporate some more movement. This weekend, I sat down and made some cards showing the various computer parts and captioned with the matching words. I printed them on cardstock and will distribute them to my students before we begin the computer parts portion of the lesson tomorrow. I thought I would call out the clues and have students stand up if they think my clues are for the part on their cards. You could easily use this same strategy for lots of different lessons, and it was easy to prepare. It only took me 10 minutes or so to create the cards.

Maybe I'll post the cards on TpT another night. I'd love to share them with you, but I'm tired! Time to relax with my sweetie!

How do you keep your students engaged and moving when the lessons get long?

Wednesday, August 22, 2012

Web Tool Wednesday: Wix

It's Wednesday, and you know what that means! I am highlighting a new web tool for teachers. As you can see, I've decided to change the name of this feature from Web 2.0 Wednesday to Web Tool Wednesday. Why? I noticed that some of the sites I've featured aren't so much Web 2.0 as they are useful tools that can be found on the Web. I know it's semantics, but I'm a stickler.

This week's tool is called Wix. It's a simple tool for building gorgeous HTML 5.0 and Flash websites. They even have a feature to create a mobile site. For my test run, I used Wix to create a simple resume site. I found it relatively easy to use but with lots of powerful tools like the ability to align elements, create social networking buttons and "bars," and change the site design with a click.

Teachers from 4th grade on up would find this tool useful for creating web pages with students--or even just for yourself! Just be aware that users must enter an email address to sign up for an account. This tool is not specifically education-oriented, so I didn't see tools for teachers to moderate sites, either. You could maybe sign up for one teacher account and then have the students create sites under that one account. That would make it easier for the teacher to manage. The user account page would then have all of the sites in a list, with the ability to view, edit, or delete a site with just a click.

Back when I taught 4th grade, we made web pages featuring student poetry. I also always admired the Oakview Elementary American Timeline website (now available only through the Wayback Engine) and thought it would be cool to do something similar. 

What would you do with Wix in the classroom?

Friday, August 10, 2012

This Week in the Preschool Computer Lab: Orientation (Revisited)

It's back to school time! Our kiddos went back to school a week ago, and Monday marks the first day of specials for our little ones. Most of my students this year will be four-year-olds, as opposed to the previous mix of three and four, almost all of my group are students returning from last year, and I'll have more self-contained special education classes than before. I'm eager to dive in and see what my year will look like with these changes.

As always I'll begin my computer lab year with an orientation lesson. We'll talk about what a computer is, how many have used computers at home, different kinds of computers, and the parts of the computer. We'll also review the lab rules. Now for that cornerstone of teaching: reflection. What would I like to change this year? Below are a few thoughts.

  • In order to make the hardware discussion more interactive and age-appropriate, I've gathered some materials to make this part of my lesson hands-on. I raided my attic for some "antique" computers and parts. This is easy when you have a tinkerer for a husband! I was able to gather (in separate pieces) a case with a removable side, an internal hard drive, an old-fashioned keyboard and mouse, and an old Macintosh Classic (pictured above). I plan to pull these out, show them to the kids, and pass around the items that are okay to touch.

  • I used a site called Growing With Technology: Katie's Room to talk about timelines and the history of computers at the end of the year. I'm toying with the idea of using it during orientation this year to show some of the old computers, or I may look up actual photos of the corresponding machines.

  • I might have students use sticky notes or something similar to respond to some sort of charted prompt at the beginning or end of class. For instance, put your sticky note on your favorite part of the computer, or next to the face that shows how you feel about computers. This is still formulating in my mind! Maybe we'll turn it into a bar graph or something.

  • I'd like to find a way to make the carpet time portion of my lesson shorter and more interactive without sacrificing all of the information I want students to hear. I've used the interactive whiteboard (IWB) in the past, but I'd love to make it a bit more fun. I'm still contemplating that one!
Now it's your turn! Tell us how your student group is different this year, what you'll do differently, and what you're doing to introduce the computer lab to your students! Let us hear from you in the comments!

Picture credit for Macintosh Classic:
Photo by Alexander Schaelss
Downloaded from WikiMedia Commons 
Further licensing information can be found there. 

Thursday, August 9, 2012

Big Back to School Sale Coming!


Can you smell the freshly sharpened pencils?! It's that time of year again, time for a huge Teachers Pay Teachers SALE! As usual, hundreds of sellers will be holding sales of up to 20% off, and TpT will be throwing in an extra 10% off of the already reduced prices when you use the coupon code BTS12. That comes out to about 28% off total!

My entire store will be on sale. See below for some sample sale prices!

Wednesday, August 8, 2012

Web 2.0 Wednesday: Triptico

I'm usually not a big fan of downloading programs to install for school use. Here's why: in my school district, you have to submit programs for review and have them tested and approved by information management before you can use them. It can be a long process and they don't always say yes. Even so, I have a great tool to recommend for you and your tech team to examine and see if it will work for you!

Triptico is a set of interactive whiteboard tools developed by a teacher named David Riley. The quick download through Adobe Air gets you a little program that contains 22 customizable widgets for use on your interactive whiteboard or just projected and manipulated with a mouse. Apps include timers, random name chooser, memory, custom spinners, word magnets, score keepers, student grouping tool, random task generator, voting utility, and some customizable academic games. Games include a critical thinking quiz where teams guess the questions to go with answers around a certain topic, a drag-and-drop ordering activity, and a game called Find Ten where students look at a set of cards and choose the 10 that fit into a given category. It appears from my examination that data entered, such as student names, is stored only on your own computer. You will need an Internet connection to play, however.

What I like best about these tools is that they are flexible. They can be used at any level and with any subject area. Most of the pre-made demo questions centered around Shakespeare, clearly for high school or college students, but I could easily customize the widgets to use with my preschoolers as well. Below are a couple of ideas that I had while reviewing the tools. Please list your ideas in the comments section!

  • Use the random task generator for students to choose a reading response task or a classroom job.
  • The ordering widget could be used to sequence a student's own writing, to check comprehension by ordering story events, or to rank the importance of factors leading to World War II.
  • The picture spinner could be used to allow preschool and kindergarten students to choose a center. You can even configure it to give results in a random sequence rather than completely randomly so that you don't overload your centers with too many kiddos.
  • It would be fun to use the What's in the Box? game, similar to Let's Make a Deal, to review for a test and to actually reward the prizes listed (examples include everything from "tidy the room" and "broken pencil" to "chocolate bar" and "new pen").
  • You can use the voting app to vote for class rewards, but you can also have students vote on content-area questions such as, "Whose side would you take in the Boston Massacre?"
  • Use the word magnets to sort words into categories, and incorporate higher-order thinking skills. For instance, sort these items into groups showing what you'd need on a trip to Mars, the Moon, or Pluto. Give a rationalization for where you place each item.
  • Perhaps I can have my preschoolers play the matching game in the lab to match pictures and words for the parts of the computer!
What could you use Triptico tools for?

Tuesday, August 7, 2012

August Currently

I'm hoping to keep up with Farley's Currently link-up every month (even though I'm a bit late), because it's fun, lets me share a bit of my personal side, and gives me the opportunity to check out some great blogs from fellow teachers! My entry is below. I hope you'll check out her original post and join in, or at least read from a few of the contributors on her link-up! The links for my B2S (Back to School) Must Haves are below the image.


B2S Must Haves:

Don't forget to check out Farley's original post and link up!

Wednesday, August 1, 2012

Web 2.0 Wednesday: Story Jumper

It's Web 2.0 Wednesday again, and this week's cool tool is Story Jumper. With Story Jumper, anyone can create a virtual book very easily using illustrations provided, along with your own photos and text. Readers can explore books digitally, and even order hardcover copies of their favorites. The site provides templates for creating books and a StoryStarter writing tutorial to help you get started, including lesson ideas and worksheets with graphic organizers for pre-writing. Check out the tutorial book (linked at the top of the Create a Book page) to see how to get started with the book builder. Some cool features include personalizing a book someone else has written, using your own photos in virtual costumes, and creating a pirate's treasure map (my son is sure to go gaga over that option).

The classroom edition of the site includes the ability to create classes and add students. The site automatically generates usernames for each student that are easy to remember and can be changed by the teacher, and the teacher sets a password that is the same for every student in the class. The teacher sets up a class duration (amount of time you'd like students to work in the site), and after that time all work is saved and students are logged out, to prevent students' accessing others' work on shared computers. When students finish working, they are asked to create a personal password so that parents may access the work at home, and there is also an option to email parents a link. The teacher can generate and print handouts that guide students through the process and instruct parents in how to log in at home and see the book. Teachers have access to all students' work through the teacher account. Classroom accounts also include a discount for bulk ordering of books.

Everything is free unless you want to order a hardcover book.

Have you used Story Jumper for publishing? What are your ideas for using these in the classroom? Let us know in the comments!

Wednesday, July 25, 2012

Web 2.0 Wednesday: Time Toast

This week's tool is Time Toast, a quick and easy way to create timelines and visualize events in a linear fashion. Simply enter events or time spans using a simple form, and the tool will build a timeline for you. You can also view the information in a table format. Each event can include an image, a title, and a description, as well as, of course, a date. Time spans include dates, title, and description, but no image. The timeline itself can also include a main image and a title.

You have the option of publishing timelines publicly or not, and tools are provided to easily share or embed a timeline if you choose to publish. Timelines can be tagged for easy searching as well, by the author and by viewers. There is a commenting feature for public timelines, but I could not tell from my test run whether comments can be deleted by the creator. I did not see any options to turn off or moderate comments.

Besides the obvious possibilities for historical timelines, timelines are great for other objectives and themes...
How do you use timelines in your classroom? What do you think are the most important pointers for teaching and using timelines? What other ideas do you have for using Time Toast? Let us know in the comments!

Wednesday, July 18, 2012

Web 2.0 Wednesday: Study Ladder

Today's Web 2.0 tool, Study Ladder, has interactive games, worksheets, books, and activities in every subject, with resources labeled for use with preschool through 7th grade. As a teacher, you sign up for a free account and enter a class name and a list of students. You can create unlimited classes and students. Then, take a look at the resources for your grade level and assign them either to the whole class or to individuals. You set how you'd like your students to login--either by entering their username and password, entering just the password, or for very young students, just clicking the GO button next to the correct avatar. The site provides you with a class login page as a start page, showing all of the students in the class.

Once your students login and play, your dashboard shows results individually for each student, including which activities students attempted, which were completed, and which were mastered. You can also generate certificates in PDF form to print for your students when they achieve certain levels. Students have your assigned activities highlighted at the top, but they have access to all of the activities if they navigate further.

Students have unlimited access during school hours (which the site has designated as 9:00-3:00 for your own time zone), and after hours they can play a certain amount per day at home. For unlimited home play either the school or the parents need to purchase an upgrade.

I had my daughter test drive the activities and she found them fun and engaging. There were several on her level (4th grade) that she found challenging, and I was able to check her progress when she was finished. I also took a look at the preschool and kindergarten activities and found many of them useful, although there were not as many activities for preschool as for the other grades. Subjects include math, literacy, science, music, art, language & culture, numeracy, health/safety/citizenship, and financial literacy. See below for a sampling of the types of resources available and some of the ways you can search for activities. This page is the main math resources page.

Could you see yourself using Study Ladder in your classroom? Are you using it already? Do you use something else that is similar? Let us know in the comments!


Wednesday, July 11, 2012

Web 2.0 Wednesday: Custom Google Maps

Did you know your students can create custom, annotated maps in Google Maps? Just go to Google Maps, click on My Places in the lefthand pane, and click on Create Map. There's even an interactive tutorial to guide you through the features. For any location you mark on your map, you can:
  • change the icon
  • move the marker
  • add a photo
  • add comments
  • add links
You can also draw on the map: freeform shapes, lines, and routes along roads. These too can be annotated with text, photos, and links. Maps can be set to public (searchable through Google Maps) or unlisted (you must have the URL to see the map). Even with the unlisted setting, custom maps aren't private per se, so it would be wise to avoid using students' personal information such as last names, workplaces, or home addresses.

What can you do with custom maps in the classroom?
  • Map historical events such as battles in the Civil War, including annotations and graphics for each location
  • Show a field trip route
  • Calculate distances and gas mileage using the routes tool
  • Have students research local areas of interest, such as museums and historical sites, and mark the map to show locations, admission prices, hours, and brief descriptions
  • French students can study the many famous landmarks of Paris and map them, annotating the map in French
  • Create a map of your life showing important places and use this as a jumping off point for writing a memoir, autobiography, or personal narrative
  • Show the route that settlers took along the Oregon Trail and annotate with primary source material. 
  • Map the habitats of animals around the world in an animal study
What are your ideas for using custom maps in the classroom? Have you used them in your classroom? Let us know in the comments!

Check out the video below for a taste of what's to come for Google Maps!


Friday, July 6, 2012

Quick Tip: Managing Thumb Drives and SD Cards

Today's post is a quickie tip about keeping up with thumb drives, SD cards, and other portable media. If you've ever tried to write your name and phone number in tiny letters on an SD card, or put an address label on a tiny USB drive, you know it can be challenging to label these small tools with your information in case of a loss. Instead, try this: take a photo of your business card or another document with your contact information, and put that photo onto your media. Make sure to leave the business card on the drive or card when you are moving or deleting other files. This ensures that all of your pertinent contact information is available to anyone who may find the card and need to contact you. Of course, you should take care not to include enough information to help an identity thief take advantage, and as always, frequent backups will keep a lost thumb drive from being a catastrophe. :o)

You might also consider using some form of cloud storage and giving up your portable media altogether. Services like Dropbox, iCloud, Box, Amazon Cloud Drive, and Google Docs may serve your needs well enough to give up that SD card or USB drive.More on that in a later post!

Thursday, July 5, 2012

Top 10 Websites I Use in the Lab


I was inspired by Teaching My 3's linky party on top 10's. What an interesting idea for a linky party! I hope she gets lots more responses, because I really enjoy reading these types of lists. Here's my entry: top 10 websites I use in the preschool computer lab, not necessarily in order.
  1. ABCmouse.com : Great for preschool and kindergarten skill-building
  2. Kerpoof!: Even the youngest students can publish work with these easy-to-use tools
  3. Starfall / More Starfall: Go-to site for topical and literacy activities
  4. Highlights Kids: This is the first place I look for seasonal and holiday-themed activities
  5. TVO Kids:Lots of easy-to-use games that focus on literacy and other skills. Paired with a Braille overlay, Letterella game works well for blind preschoolers.
  6. ABCYa!: Fun, colorful, skill-based activities organized by grade level and theme
  7. Knee Bouncers: Variety of activities for very young children or for children learning to use an accessibility switch for cause-and-effect.
  8. Help Kidz Learn: Activities for a range of abilities, many switch-accessible.
  9. All Abilities Playground: Games specifically designed for use by students with a variety of needs. Memory and Ibis Buster can be played by blind students using a traditional keyboard with tactile markers.
  10. Sheppard Software Preschool: Activities for colors, numbers, shapes, and a wonderful variety of animal games, all fully accessible for non-readers.
Be sure to make your own Top 10 and link up on Teaching My 3's blog! Click the button!

Teaching My 3

Wednesday, July 4, 2012

Web 2.0 Wednesday: Warning Sign Generator

Warning! Web 2.0 tools can be addictive!

With the Warning Sign Generator, students can quickly customize warning signs with a variety of options. There are 11 sign styles and 45 symbols, and you can customize up to 6 lines of text underneath. What could you use this for in the classroom? Let us know in the comments!

Ideas for using Warning Signs in the Classroom
  • Create classroom signs warning against use of cell phones and smoking. Warning: Smoking Makes You Look Old!
  • Designate center areas in the classroom with humorous warning signs. Warning: These Books Are Addictive!
  • After studying problem/solution in stories, have students generate warning signs that address the specific problems in the stories they are reading. Warning: Pilot May Have Heart Attack at 30,000 Feet!
  • Students on the yearbook committee can create signs warning of the regret of failing to purchase a yearbook. Caution! Failure to Purchase Yearbook May Result in Crippling Regret!
  • Brainstorm a list in class, then have students make signs warning against common errors in math calculations. Caution! When the top number is smaller, you must regroup before subtracting.
  • Design warning signs that would've helped historical figures you are studying. Notice! Silk Worms Will Not Thrive in Georgia!
  • Generate humorous signs as a part of animal reports. Warning: Bunnies Display Uncontrollable Cuteness!

Tuesday, July 3, 2012

July Currently

I happened upon the Oh' Boy 4th Grade blog and the Currently monthly feature. Here's my take! This was a lot of fun and I really enjoyed Farley's sense of humor and overall style. If we lived in the same state, we'd probably be buds. :o)

For the reads, I picked Because of Winn-Dixie because I always loved to read it with really over-the-top Southern accents. I'm not sure why I always heard the voices with Southern accents in my head; maybe it was the trailer they lived in reminding me of growing up in rural Georgia. For the professional go-to book, I had a few books I would really return to over and over when I taught 4th grade, but the one I pretty much wore out was Skill Building Morning Jumpstarts by Deborah Poston. It was a reproducible book, not a methodology book, but I used it constantly. Now that I'm in Ed Tech, I haven't really found any books I can go back to over and over. Technology changes so quickly that it's hard for print material to keep up. I use the ISTE NETS a lot, and the learning standards for my level (preschool), and other than that, I go to Twitter when I need help.


Click the button below to read Farley's post and link up!


Wednesday, June 27, 2012

Web 2.0 Wednesday: Sticky Note Round-Up

You and your students can quickly organize thoughts, ideas, concepts, and related resources visually using a sticky note / corkboard app online. There are a few to choose from. I've listed three of my favorites below, along with ideas for using them. You can also click the photos to see full-size examples of each one in use. Post your ideas for using sticky note sites in the comments!

Wallwisher
This is probably the original sticky note site. Name your wall, type directions at the top, and then give students the URL you've created so they can share. You need an email address to create a wall, but not to contribute. Posts can be moderated (meaning the teacher approves each post before it's shown) and walls can be set to private. Easy to use and good privacy settings. Notes can include text, pictures, links, videos, audio, and documents.


Stixy
Sign up for an account using your email address and create a Stixy board. You can share text notes, links, dated to-do's with reminders, photos, and documents. The layout looks a bit more professional and you have to enter an email address for anyone you invite to share a board. Boards can be set to private so that only those who are invited can see it. You can also allow guest access with a password. There is no moderation here; every invited contributor has the same privileges as the board's creator.


Scrumblr
This simple tool allows text only--no pictures, videos, or links. That's good if you want to keep it simple. You set your own custom URL. Share the URL to collaborate in real time. One feature this one has that I really like and didn't see in the others is the ability to divide the board into sections and label them. 

What can I use it for?
  • Brainstorm and then organize ideas
  • Hold a virtual book club discussion
  • List and categorize items
  • Show examples of an abstract concept using words, pictures, and videos
  • Organize your lesson plan ideas for a particular topic
  • Have students problem solve collaboratively--for math, or for social issues in the classroom
  • Hold a debate
  • Respond to picture or video prompts
  • Share ideas for ways to study for an upcoming test
  • Quiz each other
  • Race to organize concepts, words, or pictures into categories, then explain the rationale
  • Use words and pictures to do a word study for key vocabulary
  • Organize a number study using multiple representations, both verbal and non-verbal
  • Create a KWL (Know / Want to Know / Learned) chart and adjust throughout the unit of study
  • Have small groups complete character or author studies

Saturday, May 5, 2012

Wow! Huge Tchr2Tchr Sale Link-Up!

Some of you know that I am one of the admins of the Tchr2Tchr blog. In honor the huge Teachers Pay Teachers sale for Teachers Appreciation (May 6 - May 8), Tchr2Tchr has put together a Link-Up for TpT teacher-authors who are participating in the sale. Most of these are offering 20% off all products during the sale. Combined with the TpT coupon code TAD12 for an additional 10% off, that's about 28% off of the original prices. Check it out, and if you are participating, feel free to add your store link too!

Friday, May 4, 2012

Thank You Teachers!


It's a bird! It's a plane! It's Super Teachers!

Teacher Appreciation Week is next week. Hopefully your students and their parents have some lovely surprises planned for you, and many of you will be enjoying PTA luncheons or little gifts from your administration as well. Teachers Pay Teachers and Smarty Pants Teaching (that's me!) want to get in on the act, too!

In honor of Teacher Appreciation, everything in my store will be on sale for 20% off May 6-8 (Sunday-Tuesday). In addition, you can use the coupon code TAD12 to receive an additional 10% off the already-discounted price. That makes your savings about 28%! Wow!

That means file folder games, ordered pairs activities, and $3.00 items will be just over $2.00, I Have / Who Has games will be less than $1.50, resources that normally go for a dollar will be 72 cents, and even more expensive $5.00 items will be on sale for just over $3.50. What a bargain!

Here are some links to my most popular items!
 

Wednesday, February 29, 2012

Happy Leap Day!


Have you heard? There's a huge Leap Day Sale going on over at Teachers Pay Teachers! I'm offering 20% off of every item in my store, and if you use coupon code L2P9Y, you can take an additional 10% off! That's about 28% savings total. Hop by my store and check it out! Don't wait! The sale is for TODAY ONLY!

Frog image remixed from OpenClipArt.org.

Tuesday, February 28, 2012

This Week in the Preschool Computer Lab: Transportation!

It has been a crazy couple of weeks with part of our preschool program furloughed and the other part still at school, and also two early release days for students for parent-teacher conferences. Our computer lab schedule has been all discombobulated! I wanted something pretty simple for the few students who were getting computer lab last week and this week, but something that wasn't so vital that it would be bad for the others who are missing it.

Since one of our themes this month has been transportation (the other has been community helpers), I was happy to discover a cool activity on the ABCYa site that allows students to customize--and then drive!--a really cool, tricked-out vehicle. Check it out!


Monday, February 6, 2012

Rise to the Challenge!

Clip art (c) Microsoft. Used by permission.
I wasn't sure if they could do it, and furthermore, I was afraid the teachers might laugh at me. "You expect four year olds to do WHAT?" I imagined them saying. Finally, I bit the bullet and tried the computer lab lesson I had been thinking about with my Pre-K classes. It took at least 3 adults to make it work during each class session.  We were running around like crazy the whole time, but you know what? They did it!

You're probably wondering what the big lesson was all about, and I'll elaborate on that in a moment. That's not the point of this article. The point is that I tried something that I knew would be challenging for my students. I tried it even though I wasn't sure if we would fail. The results-- student engagement, student learning, and all of us adults getting to see what the students could do--were worth all of the doubts and fears. 

What I'm trying to tell you is to push your students, and yourself, a bit beyond your comfort zone. That zone where you're running around like crazy supporting the students and they are doing things they've never done before, that's the learning zone. In college they called it scaffolding. It is easier when my students are doing something they can do independently--both for them and for me--but they aren't learning at the same level. So push your kids, and more importantly, yourself!

One caveat: Don't be the stage mom who pushes her kids to the brink. During my lesson, no one was crying or having a nervous breakdown. I wasn't asking them to do something that was developmentally inappropriate. I just had a nagging doubt in my mind about whether it was just a little bit too hard. That's the sweet zone.

So what was the lesson? Last year I attended two different educational technology conferences where I saw Glogster EDU in action. I was intrigued by the easy controls and the engaging design and media. I was afraid whether it would be too much for non-reading four year olds to manage: too many steps, too many buttons, and most importantly, what would they report on when they couldn't read to do research? I finally settled on having students make a glog about the life cycle of the monarch butterfly, our school's unofficial mascot. This coincided with our monthly curriculum theme of insects and life cycles. I walked students through the process of making a glog by helping them create a class glog together at the interactive whiteboard, then set them loose creating their own with partners. As it turned out, they didn't need to work with buddies and actually resented having to share the activity! Not all of the students finished their glogs in the 3 class sessions that we worked on it, and I didn't end up publishing them on the school website as I had planned, but that truly didn't matter because of the learning that went on!

I'll post a full lesson plan at a later time along with my reflections about how it went and links to some of the glogs they created. Just this week I found myself once again pushing students beyond my own doubts, and it was a great success! I'll have to tell you about that one another time!

Related Posts Plugin for WordPress, Blogger...